Leveraging TheHive 5 notifications capabilities (1/2)
Get wind of TheHive 5 notifications capabilities through a couple of lab blog articles. From simple email notification to an automated incident response, learn how to leverage the best of this new functionality ! First part is out, stay tuned for the second. Have a good read !


Amongst the many new capabilities offered by TheHive 5 is a notification system. This allows you to automatically react on specific, and not so specific events occurring in TheHive. The use cases are plentiful: from a simple message in your team chat warning about a new alert, to a fully automated incident response playbook including forensic investigations.
In this lab article, we will explore how to leverage these notification capabilities to efficiently react on the events you are looking to. Fix yourself a cup of tea and enjoy!
Set-up your first workflow using the Notifications
First and foremost, there are a few setup prerequisites that should already be in place:
- TheHive must be connected to a Cortex instance
- The analyzers you are planning to use must be enabled and configured in Cortex
- Finally, you must be connected to TheHive with a user who has OrgAdmin privileges
All set? Perfect! Let’s get started.
To warm up, our first mission is simple: Automatically launch a Cortex analyzer when an observable is created.
Ready? Good! Open your organization management page, go to the Notifications tab then click the “+” button. The “add notification” drawer appears: chose a name that describes the notifier usage, select « ObservableCreated » as Trigger and keep « Enable notification » activated.
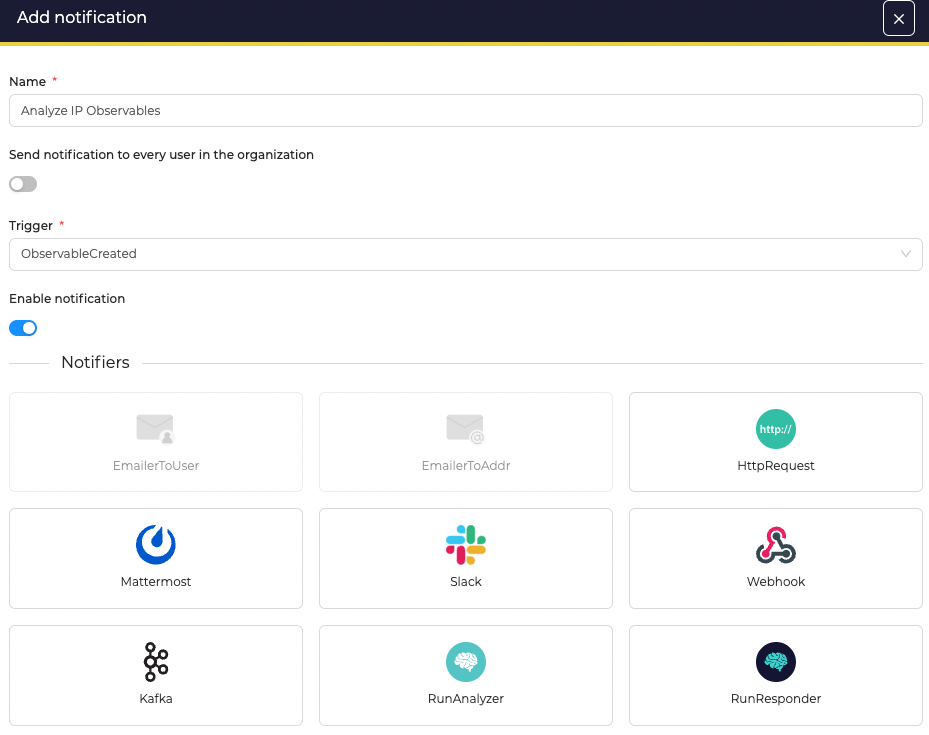
Pro tip : the « Send notification to every user in the organization » option allows to send an email to every organization member when the notification triggers (those are the members of the organization where the trigger was created). For this feature to work, SMTP must have been configured by the platform administrator beforehand.
Finally select « RunAnalyzer » in the notifiers list. You will be asked which analyzer to trigger matching the dataType of the created observable. Confirm your selection and then confirm the notifier creation. That’s it! The notifier is ready, we can now try it.
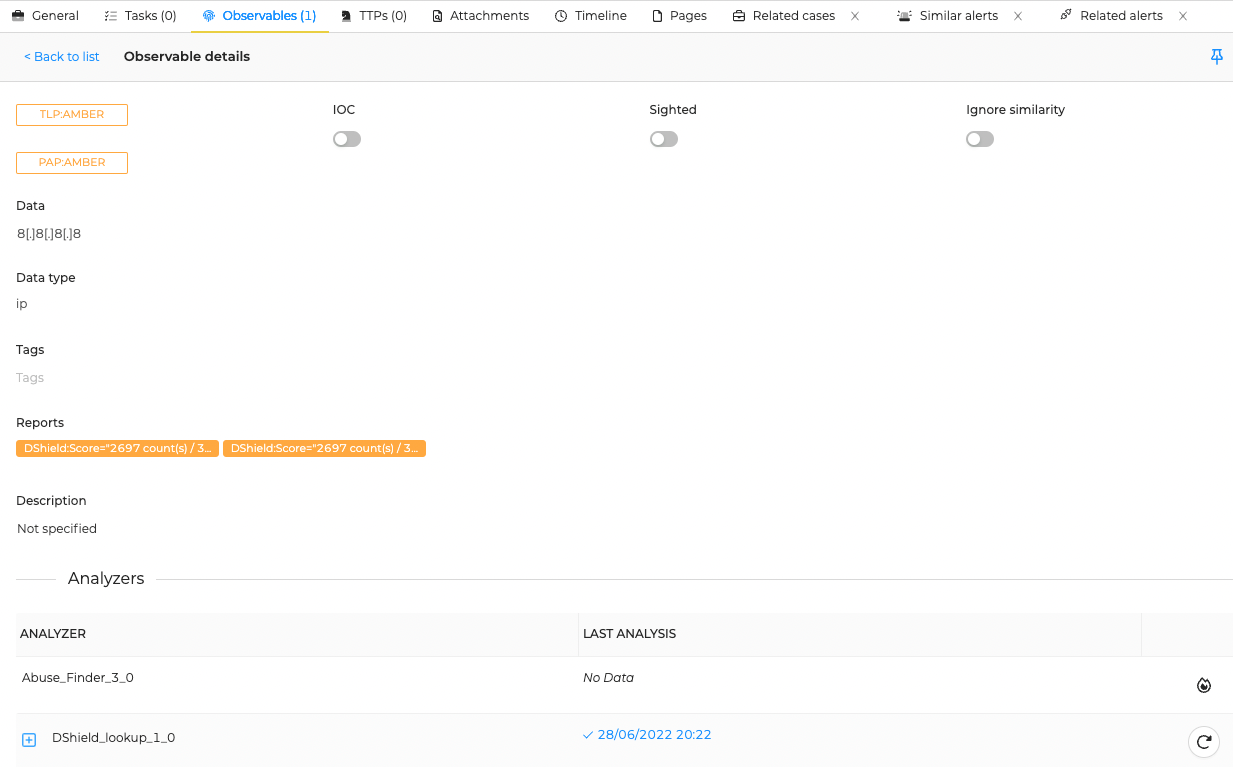
In my case, I chose to run the “DShield_lookup” analyzer on observables of type IP. To see my notifier at work, I’m going in a case, and create an IP observable “8.8.8.8” (for the sake of originality). Immediately, I can see the job is starting and the report showing up soon after:
Congrats, you created your first notifier! But we are just getting started… Let’s keep going!
Interacting with external application using Endpoints
If you are looking to interact with application or protocols that aren’t (yet) integrated with TheHive, you are definitely looking for Endpoints!
There are currently 4 available endpoints (and more will come over time!):
- Webhook
- Http listener
- Mattermost
- Slack
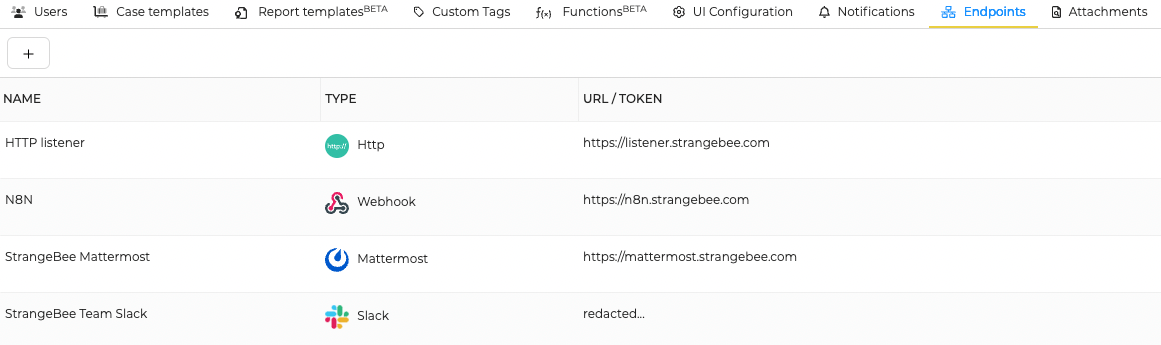
To illustrate how to set them up, we will now configure a Webhook endpoint.
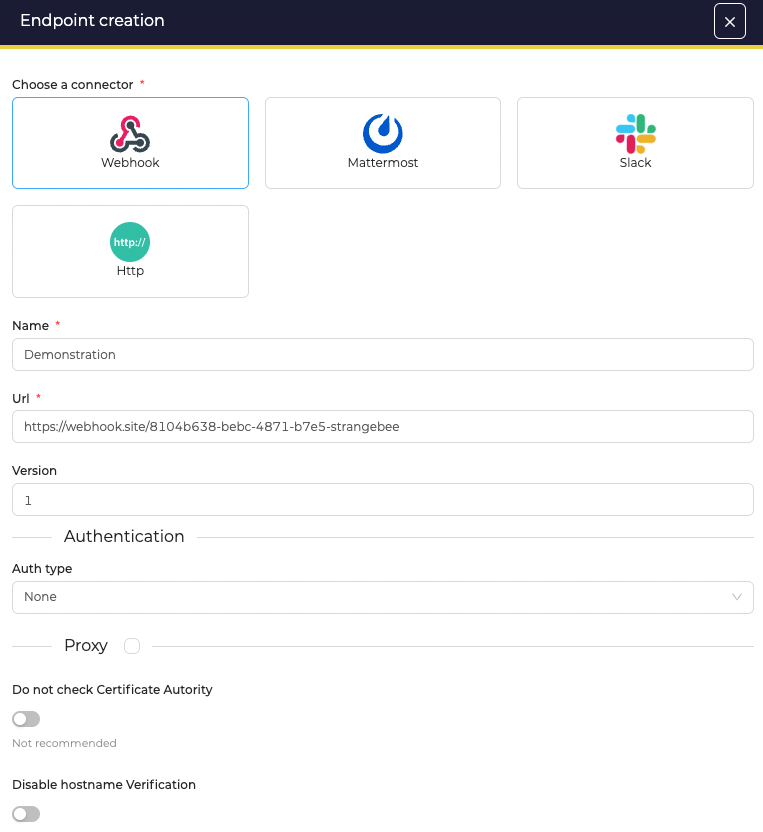
Click the « + » button to add an endpoint, choose Webhook as connector, give it a fancy name, then provide a URL where to send the webhook notifications (you can use webhook.site to easily set-up a webhook in a few seconds). Finally, we set Version to « 1 » to work with TheHive API version 1 formatting.
NB : Here we are using the webhook.site service to ease the lab endpoint setup, you can do the same for testing purposes but we strongly encourage you not to do this in a production environment, and to ensure you will not send sensitive or confidential data.
Your endpoint is now ready! There is one final step to achieve our goal: create the Notifier that will use this Endpoint.
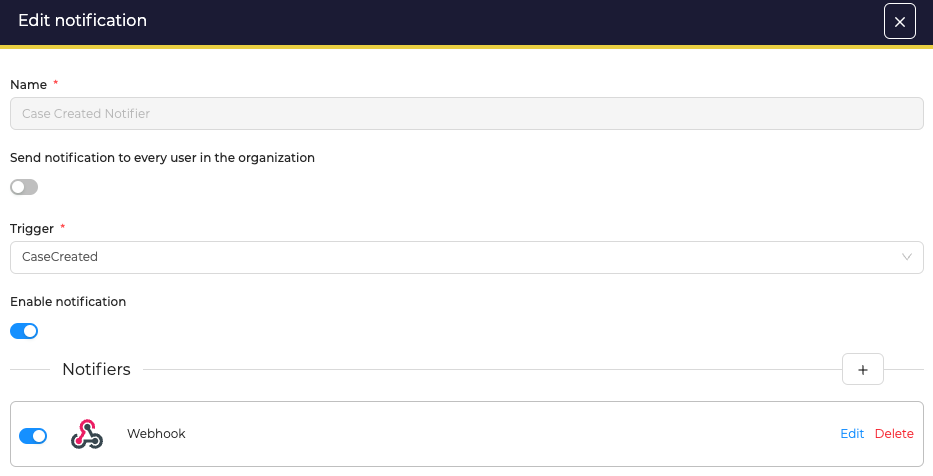
Go to the Notifications tab and create a Notifier with “CaseCreated” as trigger. Choose “Webhook” as notifier. A drawer appears asking you to choose which endpoint will receive the notifications. Select the endpoint we just created and confirm the notifier creation.
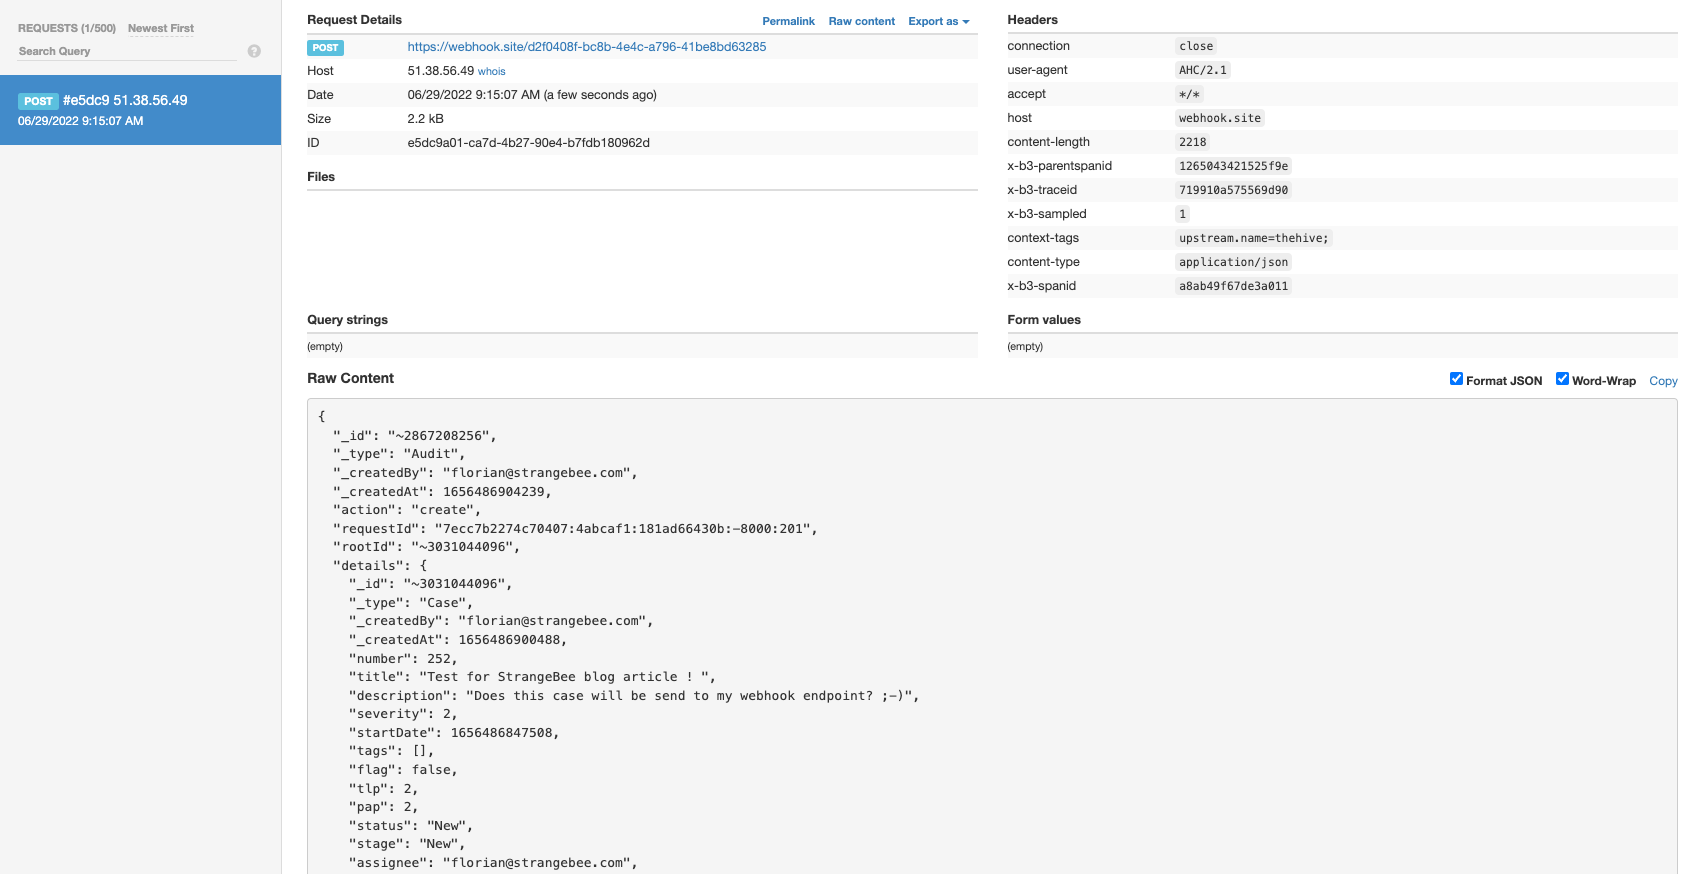
We’re done! each time a case is created in your organization, the webhook will receive a notification with all the case details, allowing to automate actions with third-parties tools, or TheHive itself. See by yourself in Webhook.site:
Congratz’! You’ve reached the end of part 1, but don’t miss this the second part to dive further into the Notifiers capabilities ;-)
Use your imagination to create amazing workflows and join our Discord community to share your brilliant ideas! Thanks for reading.
Thanks to Vincent Debergue and Alexandre Gohier for their proofreading.