Leveraging TheHive5 notification capabilities (2/2)
Get wind of TheHive 5 notifications capabilities through a couple of lab blog articles. From simple email notification to an automated incident response, learn how to leverage the best of this new functionality ! Second part is out, stay tuned for further articles. Have a good read !


During part 1, we learned how to set up an Endpoint and use it with a Notifier. In this second chapter, we will set two objectives:
- First, we will look at how to use custom filters as notifier triggers to react on very specific events and build tailored, automated incident response workflows.
- Then, we will look at adding variables in the notification payload. This is very useful if you want to contextualize the notifications (eg: a customField value, the case title,…), or to dynamically set email recipients.
You are looking to send an automatic email notification to the team manager if, and only if a case severity is changed to high or critical? Welcome aboard sailor and have a good read!
Custom filters for targeted events!
While setting up a new Notifier, you can notice a trigger named “FilteredEvent” in the list. This is where we start this lab!

Selecting “FilteredEvent” opens an empty field where we set our custom filter. A few pointers before we start building cool stuff, the filters must be JSON formatted and can use the following operators:
- and
- or
- _not
- _any
- _lt
- _gt
- _lte
- _gte
- _ne
- _eq
- _is
- _startsWith
- _endsWith
- _id
- _between
- _in
- _contains
- _like
- _match
The filters will apply to the audit of every actions that are happening in your organization. When there is a match, a notification is sent. Easy right?
Let’s build the filter we need to match that scenario: a case severity is changed to high or critical.
What I suggest you as a starting point is to get the audit log of this action as an initial reference. A very easy way to get it is to create a Notifier with the filter “AnyEvent” and reuse the Webhook Endpoint we created in part 1.
Once the Notifier is created and the Webhook listening, simply go into a case, change the severity to High and get the notification from the Webhook. It should look like this:
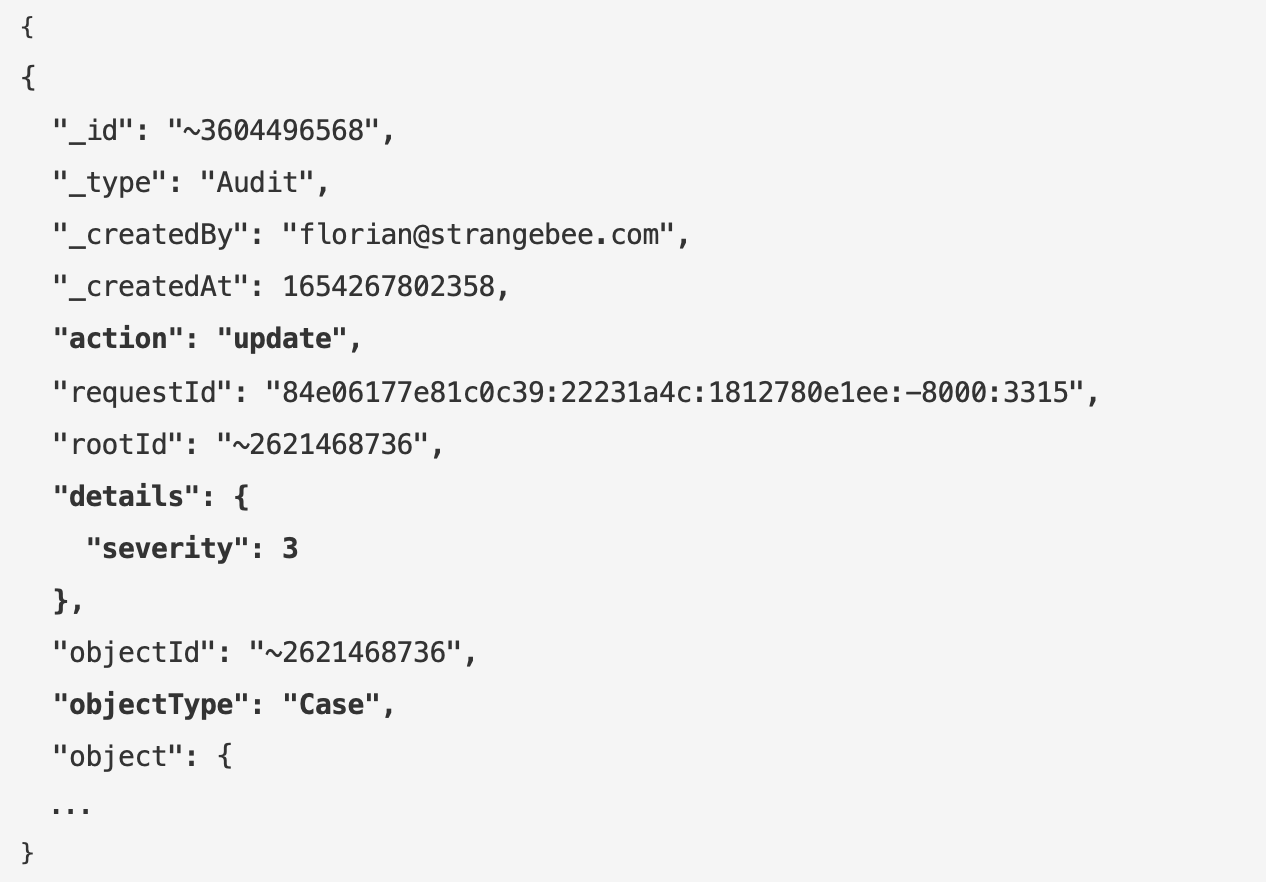
Great! We got our audit log. We now have all the keys to write the filter.
Looking back at our target, we have 3 criteria:
- The object should be of type Case
- The operation should be an Update
- The severity should be changed to High or Critical (Translated to TheHive API language, High = 3, Critical = 4)
Based on the audit log above, the 3 keys we are looking for are bold (I know, I’m a very kind person), so our filter should thus look like the code below. Be careful, it is case sensitive!
{
    "_and": [
        {
            "_is": {
                "action": "update"
            }
        },
        {
            "_is": {
                "objectType": "Case"
            }
        },
        {
            "_gte": {
                "details.severity": 3
            }
        }
    ]
}
NB: It’s crucial that your Webhook Endpoint (created during part 1) version is set to “1” for the FilteredEvent to be functional
That does the trick! The last step for our manager to receive the notification is to configure the Notifier. Let’s finish the job, sailor!
Add variables to notification payloads
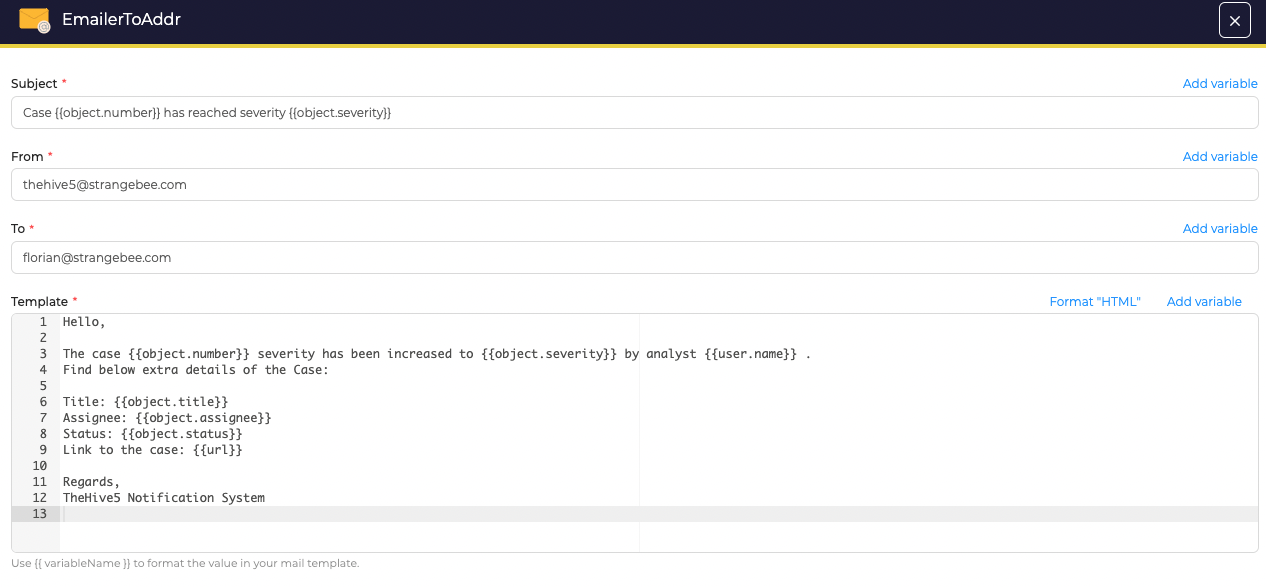
Now that we defined our custom filter, we chose the Notifier “EmailerToAddr” to send an email notification. A pop-up to configure the Notifier appears:
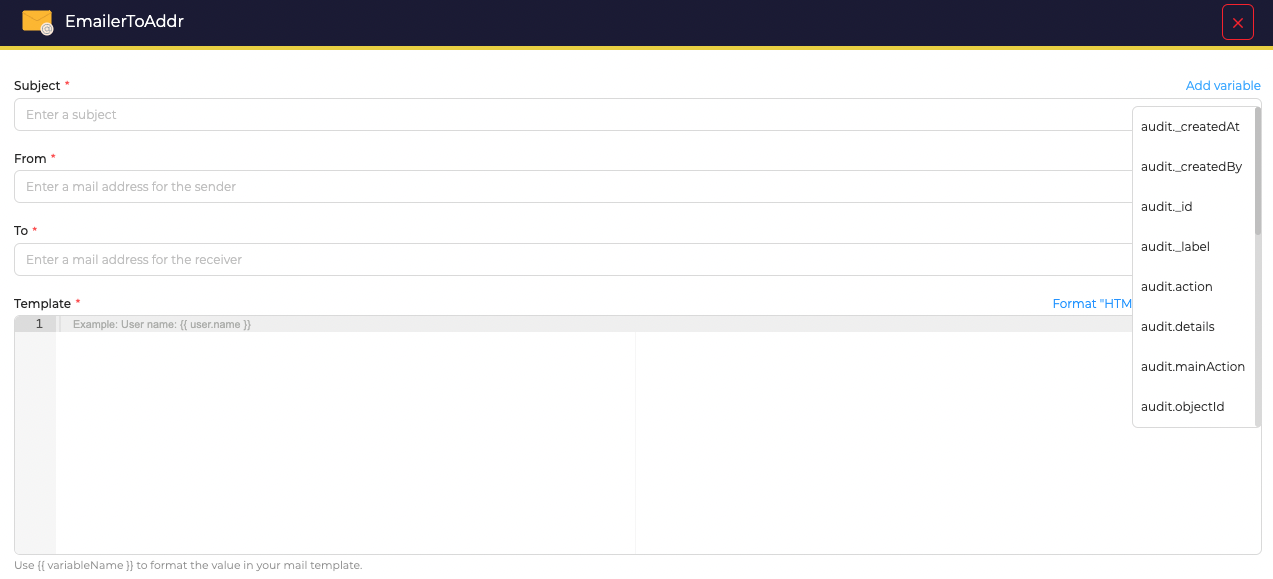
Some general guidances on how to fill the fields:
- Subject: Include only essential information for the manager to know what is happening before even opening the email.
- From: Set the mailbox that is sending the email
- To: Set the recipient mailbox
- Template : Feel free to the message you want. This will be the body of the email notification.
For each field, an « Add variable » button can help finding the desired variable. tip: the variables can be used in any of these fields, so you can get the email recipient address from a customField value, an observable, etc.
Beware that the variables list depends on the filter being used. E.g., using the «CaseCreated» filter make the «Add variables» menu suggest Case related variables, such as:
- {{object.severity}}
- {{object.customFieldValues.businessUnit}}
- …
Et voilà ! The notifier is ready, let’s give it a try ! Update a case severity to « High » and look for the email notification !
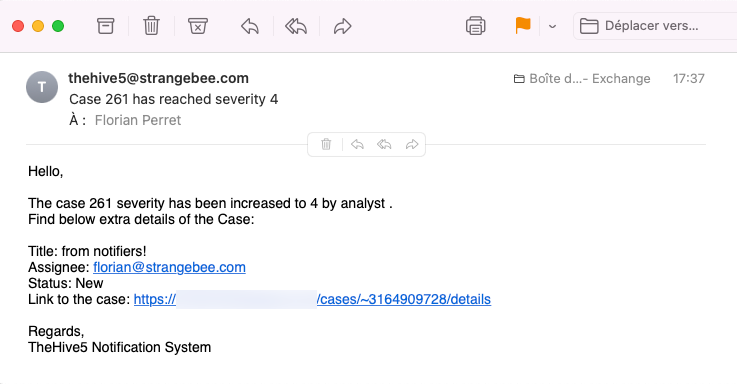
TheHive5 automated notifications have no more secrets for you! Well done!
We hope you enjoyed the read, don’t forget to join us on discord to share with the community as we will be more than happy to get to know you.
Stay tuned for the next lab ;-)
Thanks to Vincent Debergue and Alexandre Gohier for their proofreading