TheHive and Cortex on AWS — AMI tutorials part 3b: Launching TheHive manually with the AWS console
This is the third article in a series focusing on deploying TheHive and Cortex AMIs on AWS. We are publishing these tutorials alongside…
TheHive and Cortex on AWS — AMI tutorials — Part 3b: Launching TheHive manually with the AWS console
This is the third article in a series focusing on deploying TheHive and Cortex AMIs on AWS. We are publishing these tutorials alongside our AMI user guides to better illustrate what real-life deployments look like.
In part 1, we covered the reference SecOps VPC architecture used as the target environment in which we will launch our TheHive and Cortex instances.
In part 2, we used Terraform code to automatically launch TheHive and Cortex instances in our VPC.
In part 3, we will deploy the exact same thing as we did in part 2 but we will do so manually using only the AWS console. If you are not [yet] using Terraform, this tutorial is for you! This part is split in two (part 3a for Cortex and 3b for TheHive) to keep a reasonable article length.
Deploying TheHive and Cortex — overview
We will use the same SecOps VPC we set up in part 1 as our target environment. You will need an existing VPC to follow along. It can differ from our reference architecture but you should at least already be running a public-facing system that will enable https for our instances.
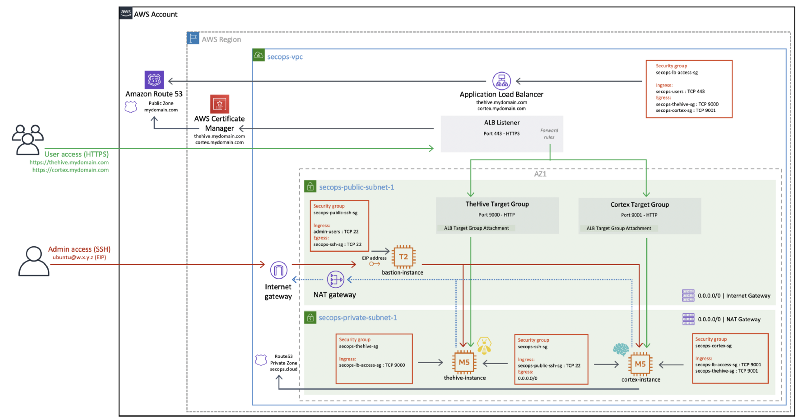
The required security groups should also be created beforehand. The rules for each component are shown in the diagram below and fully documented in our AMI user guides.
Since we will expect TheHive to connect to Cortex, we launched the Cortex instance first in part 3a. We will be deploying both instances with empty databases but your Cortex instance should now be initialised at this point and you should also have an API key ready for TheHive to connect to Cortex.
We plan on publishing an instance upgrade / replacement tutorial in this article series at a later time but you can already find detailed upgrade instructions in the AMI user guides.
Once our instances are deployed, this is what our VPC will look like:
Subscribing to the AMI
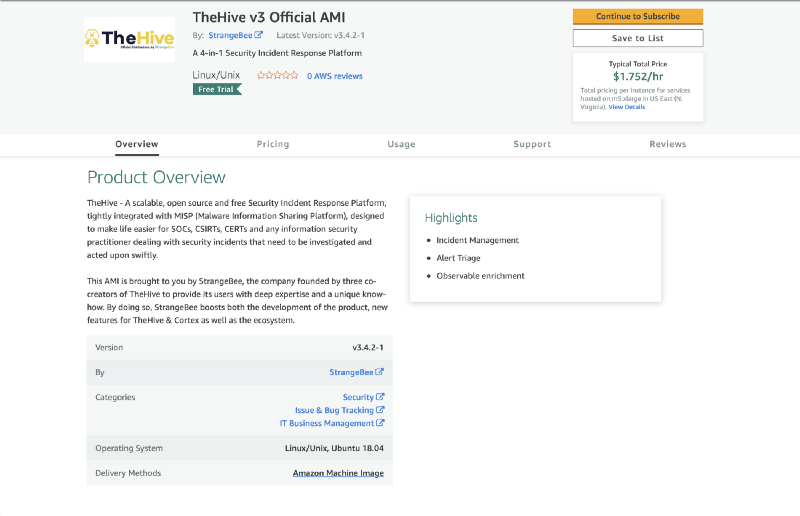
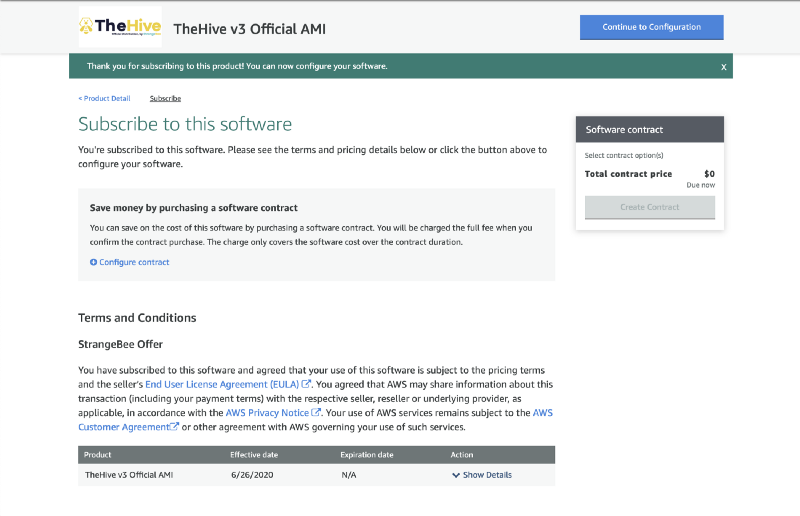
Before you can launch a TheHive instance for the first time, you must subscribe to the AMI. Please visit the TheHive product page on the AWS Marketplace to proceed with the subscription and make the AMI available for use in your account.
- On the AMI product page, click on Continue to subscribe
- Click on Accept Terms
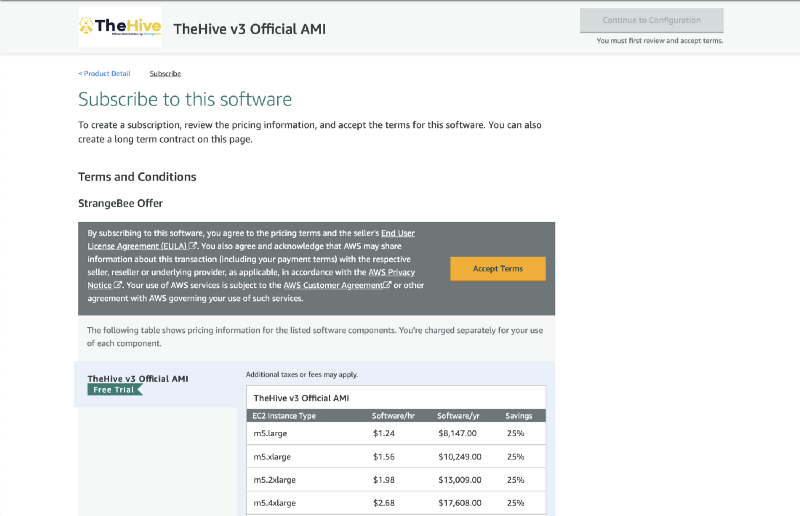
Wait a few minutes for the subscription to be effective (it’s usually very quick).
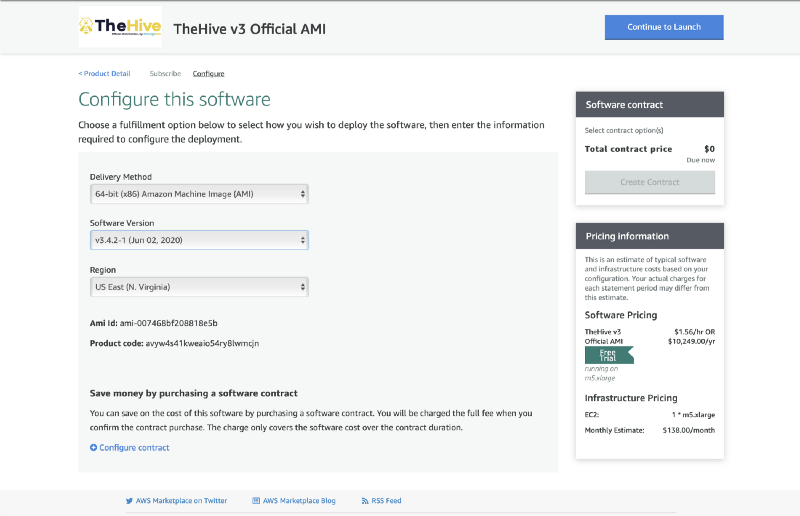
- Click on Continue to Configuration once it is enabled
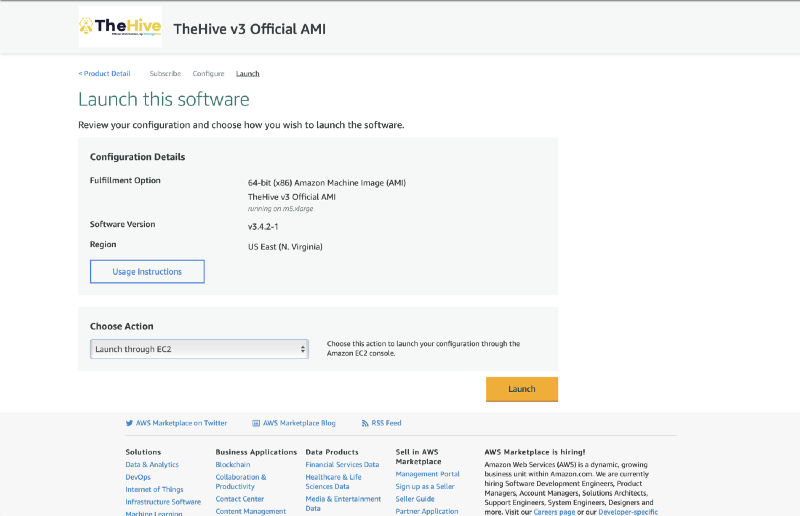
- Click on Continue to Launch
- Under Choose Action, select Launch through EC2 and then click Launch
Launching the TheHive instance
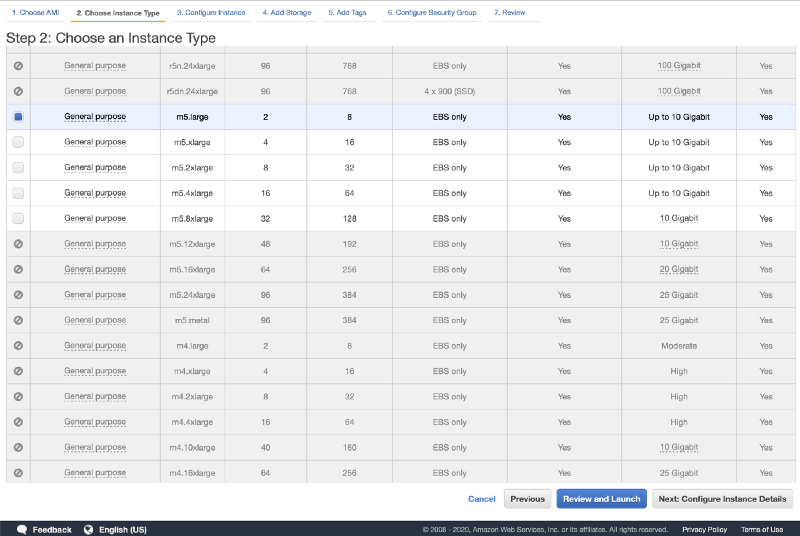
At this point, you will be taken to the EC2 console just as if you had selected the AMI from the public AMI list. You can easily find the TheHive AMI again in the future by applying a search filter on TheHive3.
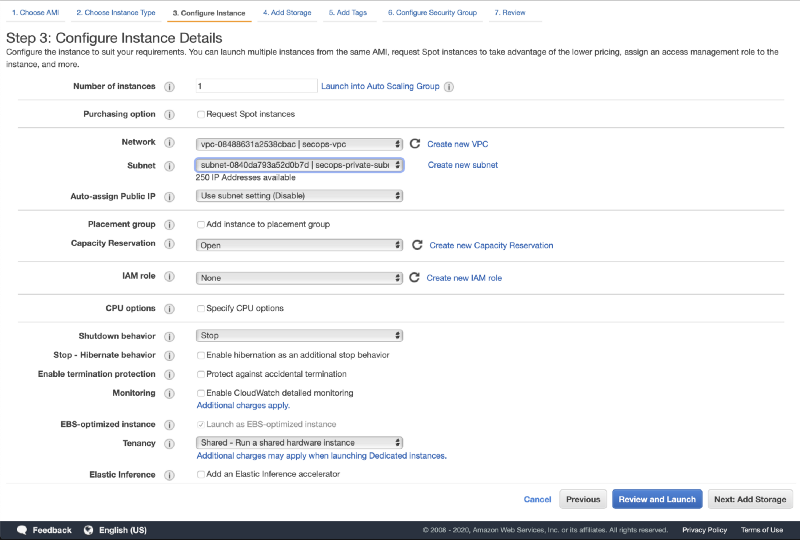
- Select your instance type and click Next: Configure Instance Details
- Select your VPC under Network and private subnet under Subnet
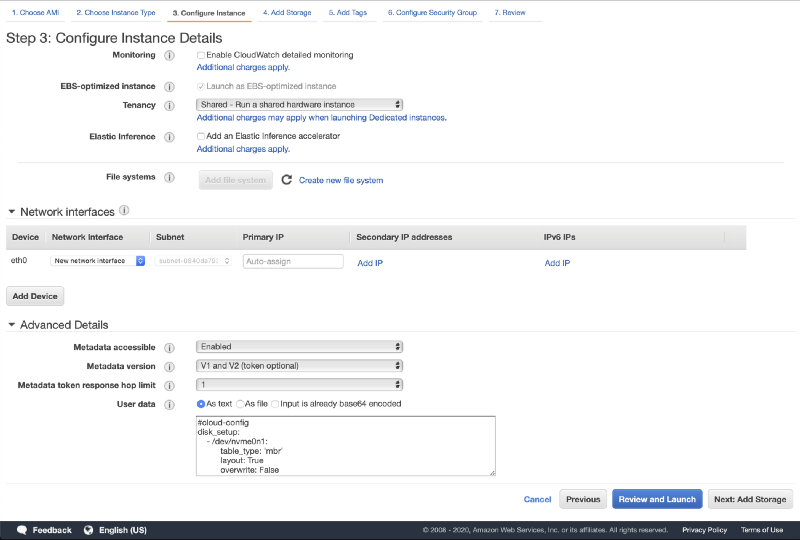
- Scroll down to User data and input the following bootstrap script:
#cloud-config The bootstrap script will partition and format the new EBS volume (the TheHive database volume) and launch the TheHive initialisation script with the new volume as argument. This script is fully documented in the TheHive AMI user guide.
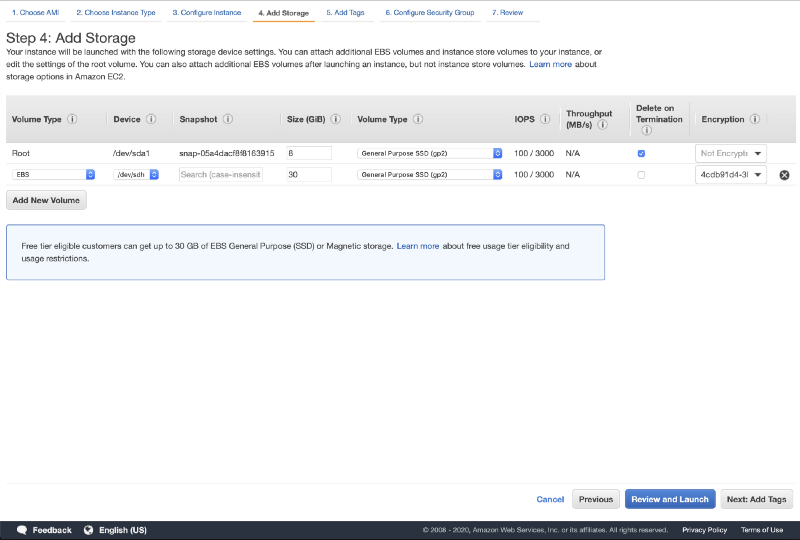
- Click on Next: Add Storage
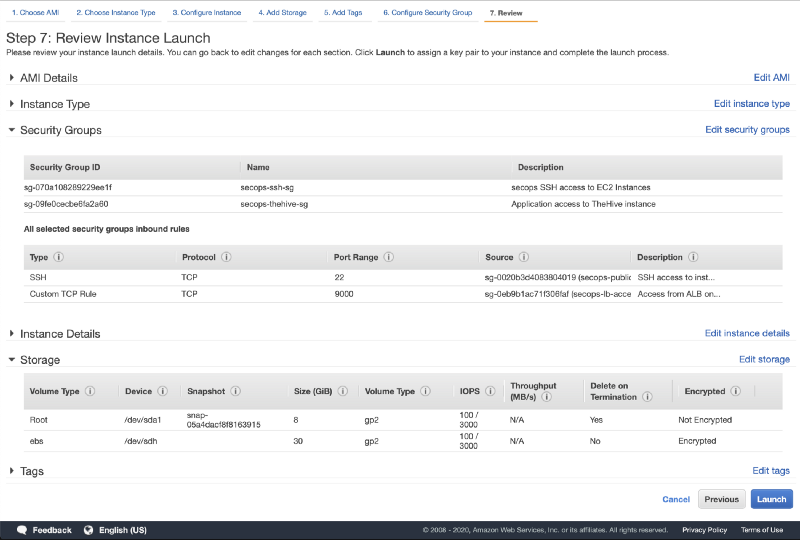
The TheHive AMI is designed to use two EBS volumes:
- The root filesystem volume
- The TheHive database volume (/dev/sdh — 30 GB by default)
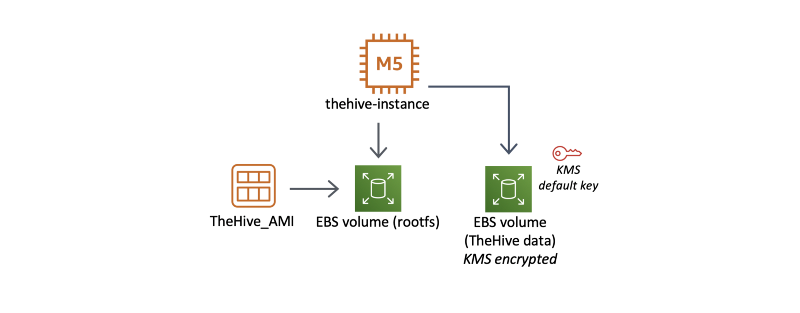
While the root filesystem is designed to be disposable, just like a container, the TheHive database volume is set to be persistent upon instance termination. Again, please refer to the TheHive AMI user guide for more information on these EBS volumes.
We recommend you enable disk encryption on the TheHive database volume. You can use the default KMS key if you are not already using custom keys.
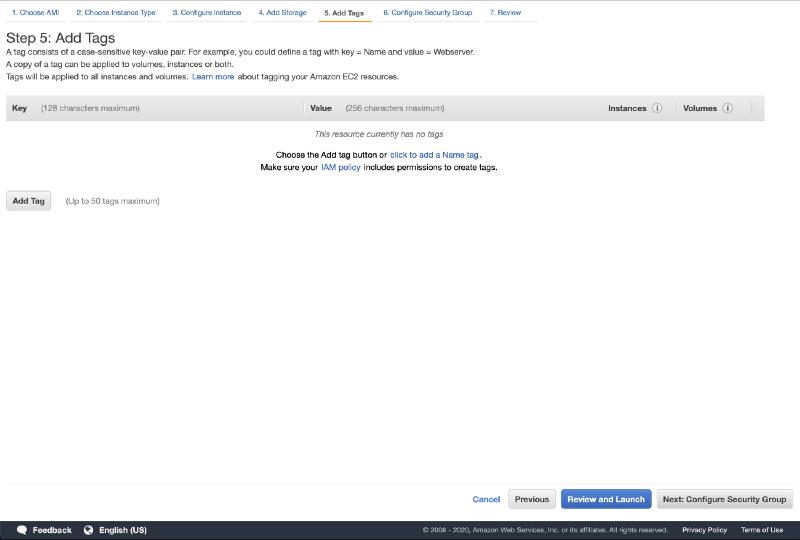
- Click on Next: Add Tags
Add tags as needed (optional).
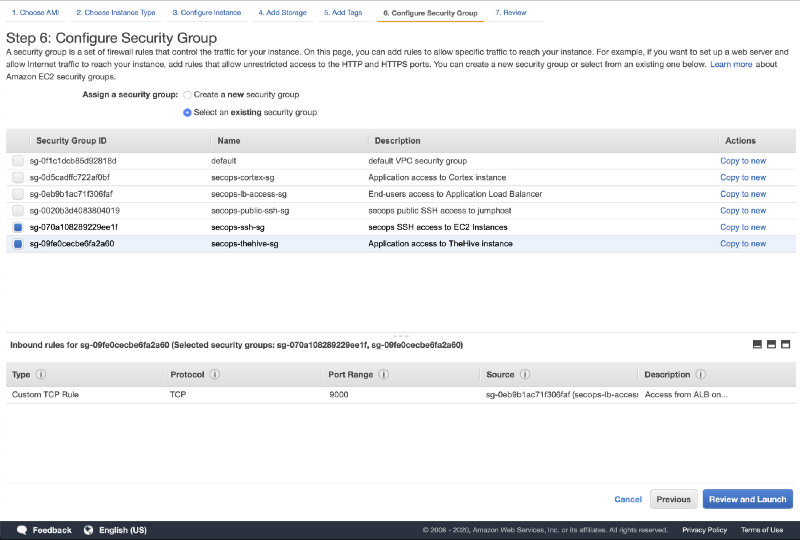
- Click on Next: Configure Security Groups
Here we need to select one or more security groups to allow the required network traffic to reach our TheHive instance. If you are using our SecOps VPC, the security groups to select are secops-thehive-sg and secops-ssh-sg. Again, these security groups are fully detailed in the TheHive AMI user guide but basically we need to allow:
→ incoming http traffic on port 9000 from the public-facing system (the load balancer in our case)
→ SSH access on port 22 from our bastion host
- Click on Review and Launch
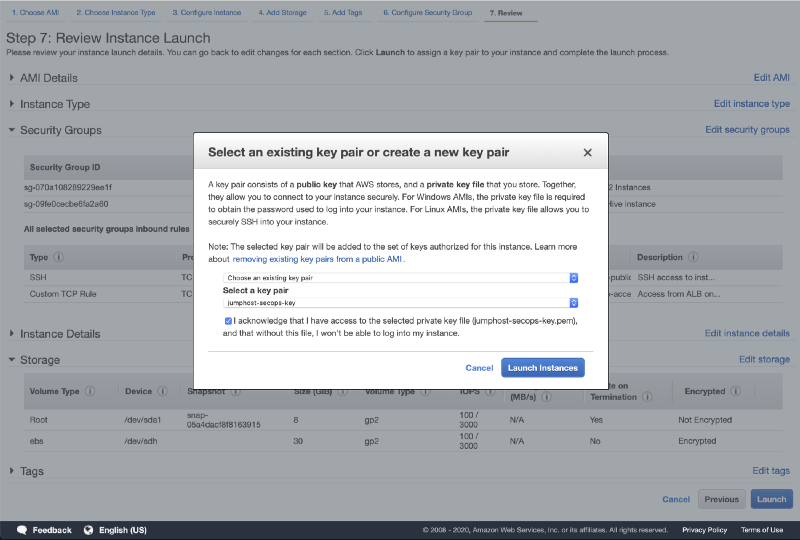
- Check if everything looks good and click on Launch
- Select your keypair and click on Launch Instances
Making the TheHive instance publicly available
Our TheHive instance is now up and running but we cannot yet connect to it since it is running in a private subnet. You must now route incoming traffic to this instance using your existing load balancer and / or reverse proxy.
AMI user guide
Wait a few seconds for the instance to launch and access the Target Group section of the EC2 console.
- Click on the secops-alb-thehive-tg target group.

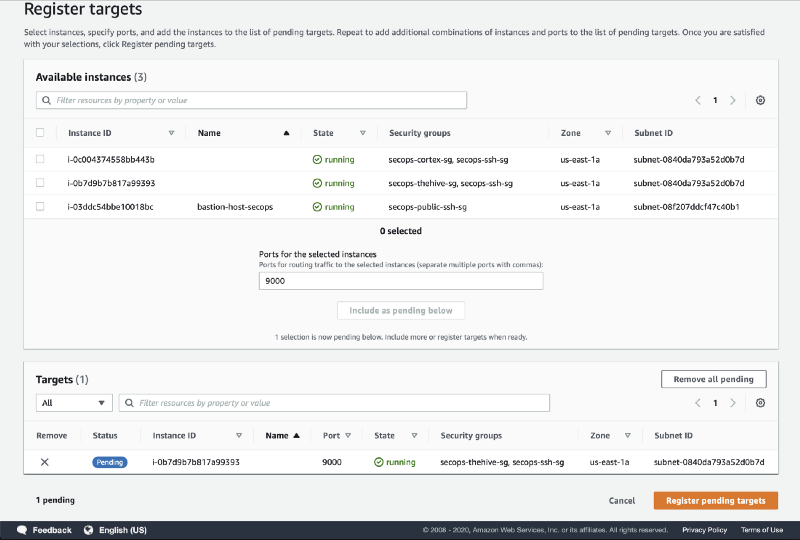
- Click on Register targets

- Select your TheHive instance, click on Include as pending below and then click on Register pending targets
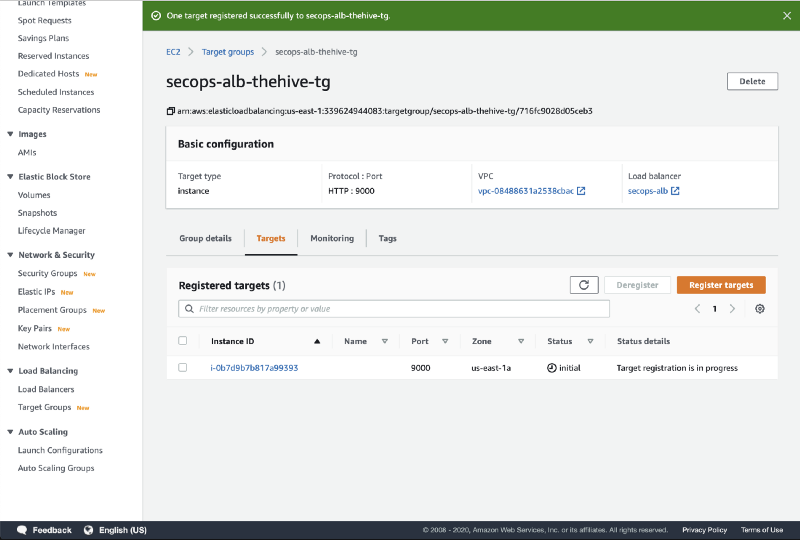
- The target is registered with an Initial status
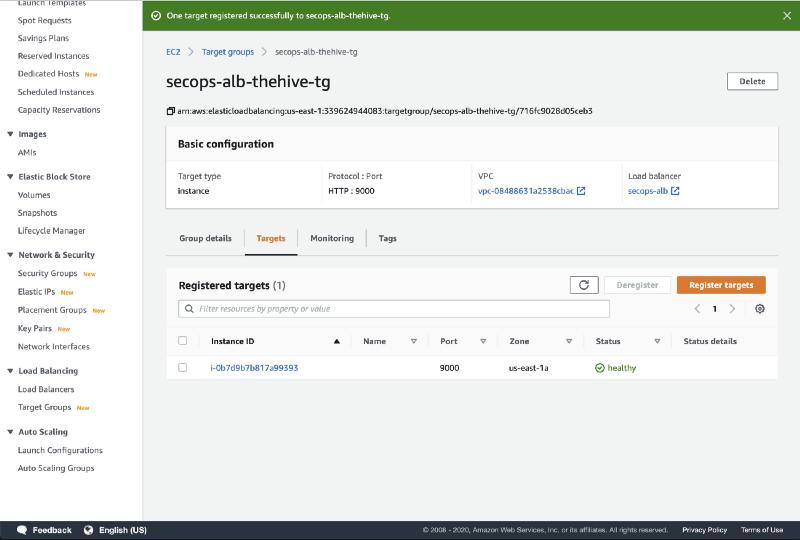
- Once the target is successfully registered and has passed the health check, the status will change to healthy
If you are using our SecOps VPC security groups, make sure your local IP address is whitelisted in the secops-lb-access-sg source IPs (or allow 0.0.0.0/0 as source if you wish to have your instance reachable from the whole internet without IP filtering).
That’s it, your TheHive instance should now be reachable and available for initialisation. Before doing so, we still have one last action to perform in the console: registering a private DNS record for the TheHive instance.
Create a private DNS record for the TheHive instance
Just like with Cortex, over time you will probably replace your TheHive instance several times (at least if you follow our recommended upgrade procedure!). Every time you will launch a new instance, its ip address in the private subnet will change, which is why we will register a private DNS record so we can easily resolve the instance’s ip address without having to reconfigure stuff every time it changes (such as our SSH config file). You could of course also manually manage static private ip addresses but we won’t cover that tortured path.
Go to the Route53 console and access the private DNS zone associated with your VPC. Create a new A record for your TheHive instance such as thehive.secops.cloud with the private ip address.
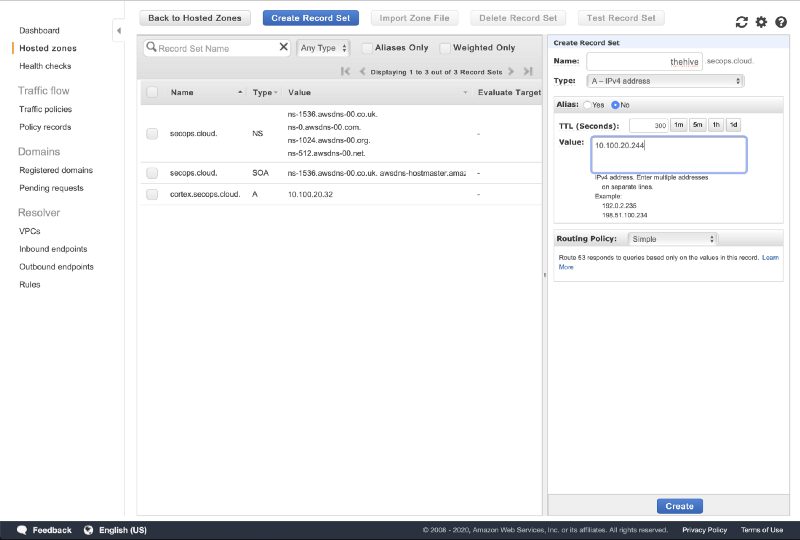
We use the secops.cloud domain as an example but the best security practice is to use a domain name you own even for private DNS resolution in split-horizon.
If you have set up a bastion host configuration similarly to our reference architecture, you can now seamlessly SSH into your TheHive instance using the proxyjump functionality of the ssh client. The easiest way to do that is to create (or update) the ~/.ssh/config file. Use the example below as a reference and replace the bastion ip address, TheHive hostname and private key information.
Host bastion HostName 1.2.3.4 (public ip) User ubuntu Port 22 IdentityFile ~/.ssh/id_rsa_private_key_for_bastionHost thehive HostName thehive.secops.cloud User ubuntu Port 22 ProxyJump bastion IdentityFile ~/.ssh/id_rsa_private_key_for_thehiveYou will now be able to SSH into the TheHive instance directly using the bastion host as a proxy:
ssh thehiveNote: Remember to whitelist your local public IP address in the bastion security group secops-public-ssh-sg.
TheHive initialisation
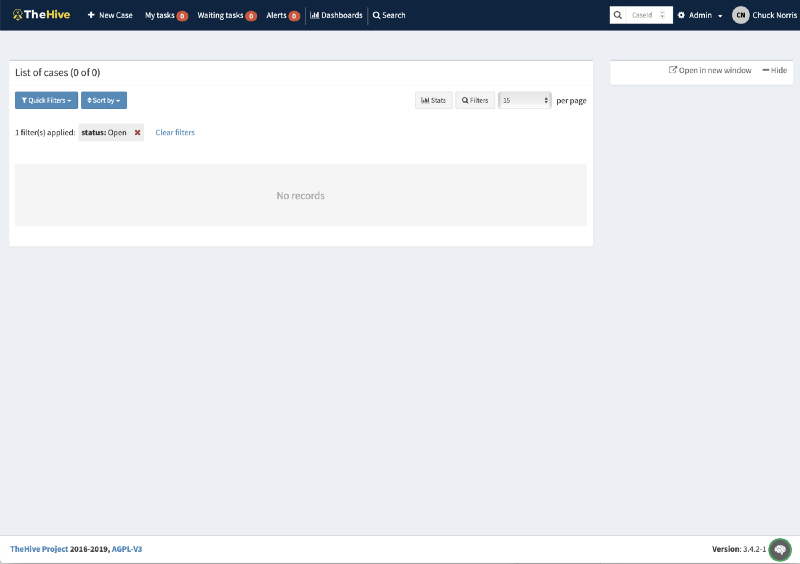
Your TheHive instance is now awaiting behind your https listener, such as https://[secops_r53_thehive_record variable value] if you are using our SecOps VPC.
As we launched a brand new TheHive instance with an empty database, we now need to:
- create a TheHive administrator
- configure the Cortex integration
The administrator account creation process is very similar to Cortex: just connect to your instance using a web browser, click on Update Database and create the first administrator account.
Configuring Cortex integration will require we SSH into the TheHive instance.
Configuring Cortex integration
SSH into your TheHive instance and refer to section 6 of the TheHive configuration guide for detailed instructions on how to configure Cortex integration.
Here is a quick version:
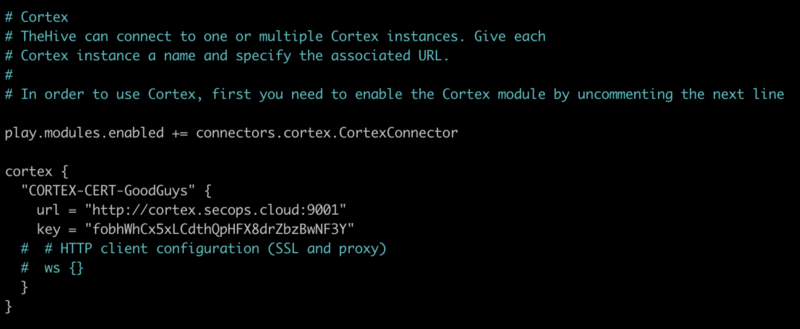
- update the configuration file located at
/etc/thehive/application.conf - enable (uncomment) the Cortex configuration section and set the Cortex URL and API key
- in our example TheHive can find Cortex at
url = "http://cortex.secops.cloud:9001" - use the API key you created in part 3a while initialising Cortex (or go create one now if you have not done so already)
- save the configuration file and restart the
thehiveservice
You should avoid pointing to the Cortex private IP address since it will change every time you destroy and recreate the instance, which, again, is our recommended upgrade method. The configuration file will be automatically backed-up daily and will be restored when you launch a new TheHive instance with existing data. This way you can update either TheHive, Cortex or both anytime without breaking the integration between them.
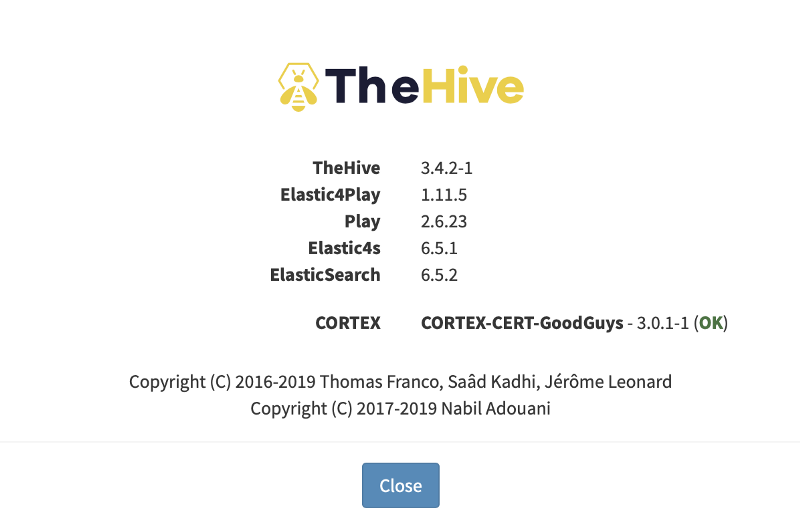
You should now see the Cortex integration in the About page or in the lower right corner.
Congratulations, you are done setting up both TheHive and Cortex on AWS!
As you may have noticed, launching TheHive and Cortex manually using the AWS console involves a few more steps than simply updating some variables and running terraform apply. It is nonetheless a good way to get the grip on the different moving pieces involved in depoying the AMIs.
As we release updated AMI versions, we will publish additional tutorials that will focus on launching new TheHive and Cortex instances with existing data to perform instance upgrades / replacements / restores. Again, doing so with Terraform will be a lot easier, most of the time it will be done simply by running terraform applywithout updating a single line of code. So going forward we strongly encourage you to have a look at Terraform. But if you prefer to stick to the AWS console fear not, we’ve got your back and we will also publish manual upgrade tutorials!
Any thoughts or questions?
We look forward to your feedback on this tutorial and on the AMI distributions of TheHive and Cortex. Get in touch with us anytime at aws@strangebee.com.